Cage Window
There are five main areas in the cage window:
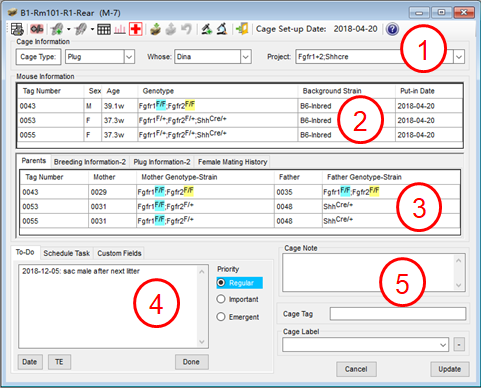
1: Cage information.
You can change owner, project and cage type here. The set-up date is determined by the program automatically based on the put-in date and cage type. The program may suggest you to change cage type after mouse transfer. De-select "Change to" if you want to keep the original type.

2: List of mice in the cage.
You can select mice here. The selected mice can be transfered out or shown in detail by clicking Mouse Detail button on the toolbar.
Tip: In mating or plug cage, double click female mouse record to add breeding or plug information.
3: More information of the mice in the cage.
You can view the information of parents, breeding, plug and previous mating history associated with the mice in the cage.
Tip: Double click breeding or plug information record to edit.
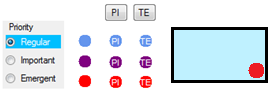
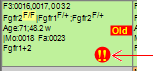
4: You can input to-do information in the box. Click "Date" button to add date before entering to-do. You can also set the priority of the to-do. A cage containing to-do inforamtion will be highlighted in census like below:
Enter "done" at the end of the to-do text or simply click "Done" button to update to-do status to "done".
You can also schedule a task on a cage.
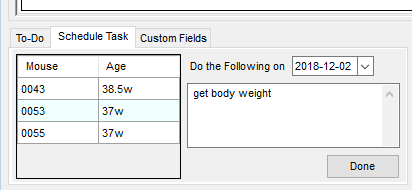
The cage will be highlighted on census and shown in task list when due.
There are four custom fields you can use to store extra information of a cage. For details see Custom Fields.
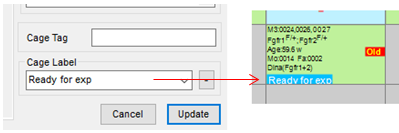
5: Cage label is another way to group cages other than project. Cage label is searchable and displayed on census. A new cage labe will be automatically saved into the database and added to the dropdown list. Click "-" to delete selected label from database.
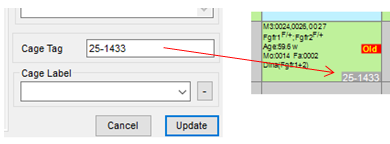
Cage tag records unique information of the cage, such as cage ID. Cage tag is shown on census as below:
Cage label, tag and note are print out on cage card.